Jack

Jack
Showing posts with label Project. Show all posts

Sunday, February 2, 2020

Hey, A New Project!

This time it's a crocheted afghan from a kit, the Northern Lights afghan from Herrschner's. The yarn is nothing fancy--not spun from the hair of female French goats fed exclusively imported grasses from the foothills of Bordeaux, and then dyed using only organic nuts and berries, or anything like that... It's just your basic, 2 ply acrylic afghan yarn.

But it's pretty!

Anyone who does any kind of fibercraft, knows that making something from a kit is like cooking from a recipe...usually you can't resist making changes. I wasn't especially thrilled with the pattern that came with the kit, so I went with a basic ripple pattern, and also made it wider & longer than the 40 x 53 the kit calls for...which means I'll have to order extra yarn, since these kits are notorious for giving you just enough yarn, and no more.

The nice part about crocheting an afghan in winter, is that it keeps you warm as you make it!

Drawbacks, though? Yes, please!
Since you work with two skeins of yarn at a time, and switch colors every two rows, you have to pay *close* attention to the color changes, working in the new yarn at the correct spots. Also, I'd like to throttle whoever is working the machines that make the yarn skeins--every single skein had lots of places where the yarn had been cut and tied back together, and they all had some pretty serious tangles, as well. I had many opportunities to practice finding my zen while spending loads of time untangling yarn.

Outside of that, it's a fun kit that works up fast, and the frequent color changes keep you from getting bored.
I love the colors, my daughter says it looks like green hills, with the ocean and a sunset.
I have to agree!

Saturday, November 10, 2018

Applesauce & Anniversaries

In our travels the other day we ran across a neigborhood sign...'Free Apples'. Cue Bat-Turn onto the street to follow the signs!

The man handing out the apples had two trees that had produced a truly gargantuan number of apples, he had them in large brown grocery bags lining his driveway--Red and Yellow Delicious varieties. Most were smaller because he said he hadn't gotten to thinning the fruit off the trees that year (been there, done that), and combined with a bumper crop year he was anxious to get rid of the things while they were still good.

After we got done petting his cool old Basset mix dog and visiting with him, we bagged up a bunch in exchange for a promise of more bags (he had run out and still had a ton of apples to bag up) and some eggs from our hens. So we trucked home the apples and ran back over with the eggs and bags...


Next was to set to work making applesauce! It came out great--I peeled and cored the apples and popped them into the slow cooker for about 6 hours with a few spices and a bit of vanilla. The house smelled wonderful! We kept some of the finished products out to eat and froze the rest of it, applesauce is terrific for adding to cookie dough to sweeten and moisten it. Yay for neighbors who share their windfalls!


Also this week was the 20th anniversary with that darling husband of mine, double yay! I wanted something a bit special and unique for an anniversay gift this year (anyone who hangs with me for that long deserves a prize) so the kid and I went shopping and found ourselves at Cheshire Antiques, a cool multi-seller antique shop here in town. After wandering around the store a bit I got an idea--to create a '20' out of various objects, kind a build-it-yourself 20th anniversary gift!

I scavenged a large number '2', a road sign number set with reflectors...but could find nothing to serve as a '0'. The staff pitched in to help me--the store has a second story that I cannot access since I can't climb stairs due to chronic gimpiness. Two employees went up there and one of the ladies came back down with several objects and I settled on a HEAVY glass and brass porthole cover.

Great, I've got my 20!  Hmmm, now for something to mount it on...a bit more prowling and I discovered a box full of fruit crate end pieces, including one with a 'Pure Gold' paper label on it--perfect! To top it all off I had a gift certificate in my purse that I'd been hauling around for about 5 years--in the past everything I've wanted at Chesire has been either $4 or $400 so the certificate had gone unused. Today was it's day to shine, and I ended up paying 35 cents out of pocket. Thanking the store staff for their awesome service we left.

Now off to Meek's hardware store, also here in town, to put it all together! Luckily the number 2 and the porthole cover already had perfect mounting holes in them, I figured if I bought the hardware, the folks at the store might be kind enough to drill a couple of holes in the fruit crate box end so that I could take the parts home and assemble them. Figuring out the hardware we needed was a bit tricky since the '2' was MUCH thinner than the '0' so would require shorter bolts. And the brass-and-glass porthole cover for the '0' was MUCH heavier so would need beefier hardware to hold it on...The kid and I were standing in front of Meek's wall 'o hardware bits juggling parts when one of the employees happened by and asked if we needed help...boy did we ever! I knew what I wanted but couldn't reach some of the stuff--their display had been designed for people taller than I so OF COURSE I couldn't see the exact parts I needed...ain't that always the way?

It was a slow time for the store, so by now several employees had appeared. One of the guys kind of took over the project and hauled all my stuff to the front of the store where he spread everything out on a worktable so we could assemble everything. I'd asked if they could just drill three holes for me, but the guy ended up actually building my 20th anniversary gift to completion! Once they started and ran back and forth getting the right hardware they got so enthused I didn't have the heart to stop them, they got so into it...plus they know their products best so I went with their recommendations. They even had lovely brass hardware to match the porthole cover! The Meek's folks were so kind, I explained that because my hands were messed up I couldn't hold a drill any more so they just charged me a few bucks for the hardware--small towns are wonderful!

But damn if between all of us if it didn't work out, go together in the end and turn out AWESOME!
And here's the finished gift!


It was just one of those times where fate smiled on me, people I didn't even know went above and beyond the call pitched in to help me and everything just kind of weirdly fell together.
J. likes it, now to hang it on the wall!

Friday, October 1, 2010

Wings Progressing...

Last night I found THE trick to faux painting the Weeping Angel wing feathers: one of those hand-held little net shower scrubby things on a handle.

The net works perfectly to blend the black & white paint blobs without overblending them into an amorphous, boring gray. It leaves little flecks of color, much more like natural stone. Here are a few of the completed feathers--they look a lot darker & better in natural light without the camera flash, though:


And yeah, I have paint & Modge Podge EVERYWHERE but I'm not going to bother cleaning off my work surface until I'm done.

Once I caught on to the trick, I had to repaint a few of the feathers so that they would all have the same look, but so far it's the only thing false step in the process. Not bad considering I have no idea what I'm doing and am learning as I go. The only other faux painting like this I've done was years ago to marbelize a big, old steel desk I had, which actually came out kinda cool and really looked like it was carved from green marble...but I credit the faux painting kit and excellent instructions for that more than me.

So the finished feathers start off with a basic gray undercoat, let dry. Then I applied the black/white sponged-on paint, let dry. Then for texture came the matte Modge Podge, also applied with the net shower scrubby thing in big, thick, globs; let dry. Finally I thinned a bit of 'Iron Oxide' color paint with water and applied it in long runny drips, allowing it to run down the feathers, let dry. The final runny brownish color is to help simulate age. I also sponged the black/white onto the foamcore wing bases in case they showed through the foam feathers.

A close-up of the feathers:


I may add a hint of sponged-on sage green color here and there to simulate old moss. I thought of adding a bit of real sphagnum moss here and there, but we'll see how it goes.

I still have more feathers to make, I'm pretty sure I don't have enough yet. I also have to paint the dress & tights...but I want to wait on that until I get the wings done--I'm glad I hadn't done it yet since the new painting technique I did last night dramatically changed the feather design. I'll also have to go over the wig.

Tomorrow I'll get the straps & buckles for the harness...I plan on hitting the thrift stores for old backpacks to cannibalize for backpack strapping, I also need thin gray fabric to glue to the chicken wire supports inside the wings. I can get that at the thrift store too, and since it won't show I can have more leeway as to what it looks like, any old shirt'll do.

Now to design the harness!


Thursday, September 30, 2010

Work Progressing On The Weeping Angel Wings!

The last two days have been devoted to the wings for the Weeping Angel costume. I'm trying to make them early-on, so I'll have time to fix mistakes. Meanwhile, they are making an unholy mess of my living room, there are bits of foamcore & craft foam everywhere!

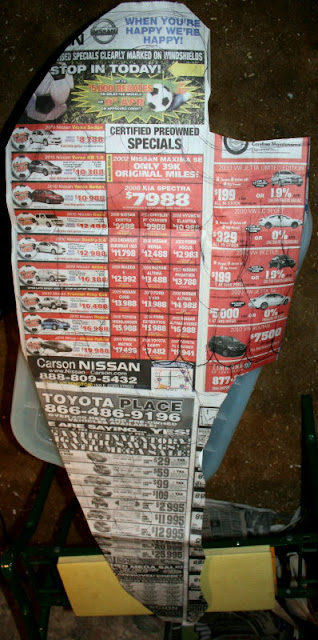
Designing the pattern, I drew it out on paper first. Spent a lot of time squinting at pictures of the Angels' wings to get an idea of what they looked like, then just used a small dish for a circle shape and freehanded it on newspaper...


In detail...


I had to size them to fit the kid. The core of the wings will be made of foamcore, I got one of those tri-fold school science project boards and cut it up. The fold works nicely as a hinge, so each wing will have a double thickness. I'll glue fabric (so the glue holding the wire to the foamcore has something to grip) to chicken wire, then sandwich that between the fold in each wing core. I'll make her a harness of backpack strapping & buckles, and attach that to the wings so she can wear them. 


Then I cut individual feathers out of the thin craft foam, and used a dull pencil to mark & score the feather details so they'll have a 'carved' look. I also cut some chunks out of some feathers here and there to match the ones on the show. I made the feathers various lengths, the ones that will line the long edge of each wing have a bit of a curve to them as well.

These I've since painted gray, using the rag-on technique so they aren't one uniform color.


The smaller feathers at the top are a little different:


Then they got their first coat of gray tempera paint, ragged on with a paper towel. The tempera works well since it gives a nice, flat look. After the gray dried I brushed some black paint into the grooves, then wiped most of it away, leaving some in the grooves. When I did this it also helped the look of aged stone with the black 'running' down the feathers.


After that dried, it was time for the finer detail. I put a few drops of black and white tempera paint on a paper plate, and used a round brush to 'pounch' it onto the feathers, using a paper towl to help blend. After that dried, I mixed a drop of 'Iron Oxide' color paint into some water, then applied a few drops at the top of the feather, allowing it to run down.

Here's how the feathers looked after the final coats of paint:


After this dries, I'll apply a thick, uneven coat of matte Mod Podge for texture--the finished wings need to look like stone, without weighing as much as stone!

They are looking pretty good so far...but they really ARE taking over the living room, darned things are everywhere! I got some fabric stiffener for the dress, that should help the 'stone' look along nicely. I'll have to brush some of the same paint layers onto her dress and onto the gray tights that she'll be wearing on her arms & legs, so that everything matches.

This is an interesting project so far, because I've never done anything like it before and I'm just kind of winging it (ha) and putting my trust in paint--!


Saturday, April 10, 2010

Because I Don't Have Enough Projects...

Here's the latest one for the kids' room, a hanging lamp with a shade made from colored plastic drinking straws!

Only the one I want to make will be round. It will be made with standard lamp parts, with the straws far enough away from the light bulb to prevent any melting/fire hazards, so no worries there.

I'm going to cruise the local thrift stores for old lampshade parts to revamp, but the wiring will be brand new--you DON'T want to take chances with THAT part. I'll be sure to take pictures!

Wednesday, January 16, 2008

The New Chicken Run Is Complete!

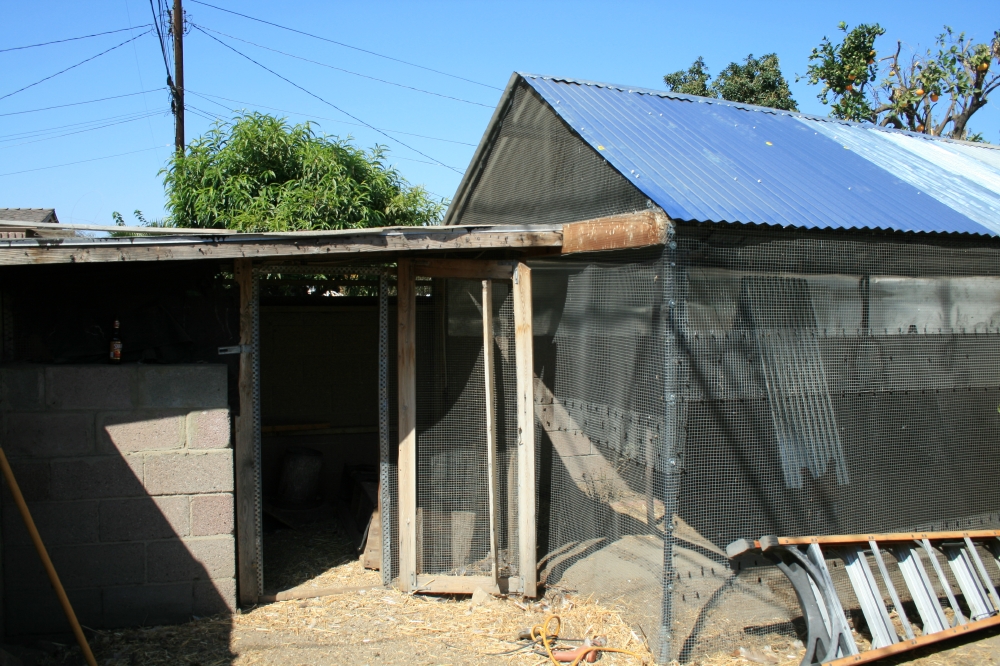
After many months of building, the new chicken run is finally done and housing the chickens nicely! Here are two pictures of the old coop before:


And the area where the new run was attached to the existing coop, which was left in place.

I had to give up my clothesline area temporarily.

The new run's framework is tubular steel, which used to be a canopy over our patio. A windstorm pretty much took care of the canopy one night, leaving the steel skeleton. So we recycled it!
As soon as you dig a trench, chickens set to work busily filling it in again.  They should work for Cal Trans, I swear. The race was on to get the hardware cloth up before they obliterated the trench.


Unfortunately one of our elderly little bantam hens, Chicken Sister (she used to have a twin sister, hence her name) in this shot has fallen into the trench we dug to bury the hardware cloth below ground in. Fresh dirt being irresistable to chickens, of course.  She had been looking over her shoulder at ME when I was taking this picture, when she SHOULD have been looking where she was going. This is her, wings outspread, legs dangling in the trench and looking like a chicken pancake, poor baby. Only her dignity was hurt, though.  The other chickens STARING at her didn't help. We lifted her out and she went on her huffy way.


The doorway is framed in and the hardware cloth wire is going up. Sheet metal connects the existing cinder block fence to the canopy framework. We didn't use wire here in order to reduce drafts. The hardware cloth overlaps by several inches to help block rodents and predators.
You'll notice in a lot of these pictures Phoenix and his hens are in the foreground, provided the ever-vital Direct Chicken Supervision that ALL projects require.


The corrugated steel roof going on. J. used steel 2x4's and sprayed in expansion foam to help seal any openings.


The view from the inside. Where the sheets of hardware cloth met, J. overlapped them be several inches and I secured the gaps with UV resistant heavy duty zip ties to keep out rodents, possums, etc. Metal 2x4's form the roof skeleton.


A better look at the sheet metal.


Inside again, looking towards the old coop. We left the old coop as it was and just removed a wire panel off the front of it to create the opening into the new run. The old coop door we closed securely and left as it was.


A better view of the old coop opening and how old and new connect to each other. The old coop door was sealed up.


The wire panel removed and the nest boxes rearranged. You can see the expansion foam in place in the ceiling.


The new door to the run. J. found two identical, perfectly working steel security doors, with locks, keys and doorway framing, sitting curbside one day. Perfect for chicken coops!

There is one more door, which will be installed soon when we attach an 'aviary door' to the run. Aviary doors are just a set of two doors set a few feet from each other, so one is always closed before the other can be opened--it prevents escapes of birds and helps keep predators out. J. is installing a new clothesline for me, it will fit inside the run and stretch from one end of the run to the other. The big metal T stands for the old clothesline we just left. Several banty hens have fallen in love with the one inside the run anyway, and perch on it at night.

So yay, it's done! We've already tested it by going away for Thanksgiving and leaving the chickens housed in it for three days, they did just fine. It's very nice to know that we can now stay out after dark, without having to rush home to put the chickens away.